{ "@context":"http://schema.org", "@type": "BlogPosting", "image": "https://sewingempire.com/wp-content/uploads/2020/12/how-to-set-up-a-sewing-mach.png", "url": "https://sewingempire.com/how-to-set-up-a-sewing-machine/", "headline": "How to Set Up a Sewing Machine - Beginners Guide", "description": "There are so many sewing machines. It's possible to share a method of all. Here you'll learn the general method of how to set up a sewing machine.", "dateCreated": "2020-12-23", "datePublished": "2023-03-24", "dateModified": "2023-03-24", "isFamilyFriendly": "true", "copyrightYear": "2023", "copyrightHolder": "Sewing Empire", "accountablePerson": { "@type": "Person", "name": "Henry Leo" }, "author": { "@type": "Person", "name": "Henry Leo" }, "creator": { "@type": "Person", "name": "Henry Leo" }, "publisher": { "@type": "Organization", "name": "Sewing Empire", "url": "https://sewingempire.com/", "logo": { "@type": "ImageObject", "url": "https://sewingempire.com/wp-content/uploads/2020/10/Sewing-Logo.jpeg", "width":"500px", "height":"108px" } }, "mainEntityOfPage": "True", "keywords": [ "How to Set Up a Sewing Machine", "Setting Up Sewing Machine", "How To Set Up A Singer Sewing Machine", "How To Set A Sewing Machine", "How To Set Up Your Sewing Machine" ], "genre":["SEO","JSON-LD"], "articleSection": "Blog" }
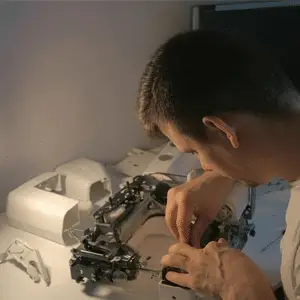
Have you got your first sewing machine? Are you excited enough to start working on it? Don’t know how to set up a sewing machine?
No worries, follow the following steps and make sure that you have taken the required steps before starting working on your machine.

Whether you are a beginner or a seasonal user there are fundamental steps that need to be followed to have smooth and secure handling. Let’s have a look at the steps of setting up sewing machine.
In a quick review, You will learn the following things in this guide:
- Why We Created This Guide?
- Step By Step Guide On How To Set Up A Sewing Machine
- 1. Unbox Your Sewing Machine
- 2. Find A Suitable Surface To Place Your Sewing Machine
- 3. Plug-In Your Machine
- 4. Insert The Sewing Needle
- 5. Add A Spool Of Thread To Your Machine
- 6. Thread Your Machine
- 7. Guide The Thread Towards The Needle
- 8. Add Thread To Your Bobbin
- 9. Wind Your Bobbin
- 10. Add the Bobbin to your Machine
- Wrap Up
Why We Created This Guide?
I understand that setting up a sewing machine can be overwhelming. So, don’t avoid the thought of setting up your sewing machine, it’s easier than you think! This guide will show you how to set it up like a pro!
What Can You Do With A Sewing Machine?
For those who love to sew and craft, a sewing machine is an essential tool. It can help you with almost every problem related to clothes or fabric!
You might need:
- To fix some pants that are too long? Use the rolled hem foot inside your kit for this job. You won’t even have to take them off first!
- Do you want some new accessories on an older outfit? A sewing machine has got it covered!
Crafting is a great way to relieve stress and boost your mood. With the functionalities of a sewing machine, you’ll be able to update clothes that don’t fit or add embellishments in no time!
No matter what kind of fabric it’s made from cotton, silk, denim – there are plenty of options for anyone who wants o get their hands on some new threading techniques.
These machines are the ultimate tool for creating new and unique pieces. From customizing clothing to yarn drawing, embroidery designs, interior décor – these sewing machines have got it all!
Once you get familiar with your machine’s functions there is no limit on what kind of artistry you can create.
Supplies Needed To Set Up A Sewing Machine
But before we jump into the steps on how to set up your sewing machine, as well peek a list of essential supplies and resources you need. Here is a list:
1: Your Machine’s Manual
With an instructional manual, sewing is bound to be very easy. In case you misplaced yours, you can pause and go find it or simply download one here.
Your user guide includes a ton of information on things like how to use your machine plus troubleshooting tips and info on the advanced features that will allow for excellent results in most cases.
2: Thread
When you are sewing your clothes together, it is important to use a high-quality thread. When using inferior quality thread for this project, the product will not last long and may even unravel over time leaving all your hard work in shambles.
When sewing, it is important to choose the appropriate type of thread. For denim projects, heavy-duty polyester works best whereas for smaller items like pillow covers a regular spool will suffice. When buying cotton or multi-purpose threads ensure you are purchasing quality!
3: Sewing Needle
Choosing the right needle for your sewing projects is as important as choosing the thread, fabric, and any other elements you use. For instance:
American Sewing Machines – Needle sizes range from 8 to 19. A size 8 is used for finer and lighter fabrics while a number 19 works better with heavy materials
European market machines -The starting scale of needles are 60-120 depending on how thick or thin they are.
Always remember, The finer the fabric, the lower its thread count. The heavier it is, the higher its number of threads per inch (TPI).
Learn: How To Change Sewing Machine Needle
4: Bobbin
Your sewing machine will basically make stitches by catching thread from the upper and lower threading systems of your machine.
We recommend using transparent bobbins like the ones displayed above with your machine to hold both types of yarns for easier work ability.
Step By Step Guide on How to Set Up a Sewing Machine
Read the following guide & Learn how to set up your sewing machine like a pro!
Step 1: Unbox Your Sewing Machine
When it comes to unpacking your sewing machine, you have a lot of work ahead. First, find the necessary guides and manuals that will help you set up your new device properly.
Storing these items safely is important because they are essential for maintaining good functionality over time!
Step 2: Find A Suitable Surface To Place Your Sewing Machine
If you have a spare room in your home, using an elegant sewing machine table would be ideal for crafting and working on projects.
Step 3: Plug-In Your Machine
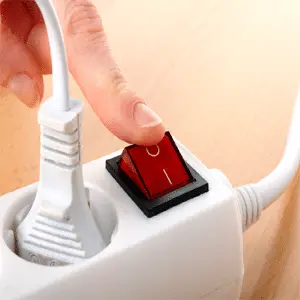
First, you need to make sure your sewing machine is plugged in and on.

This can be done by locating the power switch (Singer & Brother machines) or a foot pedal (Janome).
Once this step has been completed, all that’s left for you to do is sew!
Step 4: Insert The Sewing Needle
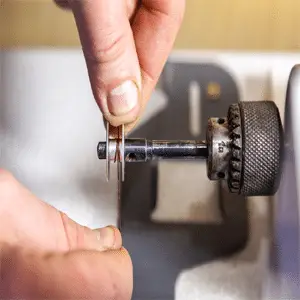
If you want your stitches to come out the same way, make sure that you insert them correctly. In this stage use a needle insertion tool so as not to be pricked by the needles (as they are inevitably going to prick).
Step 5: Add A Spool Of Thread To Your Machine
Your spool pin is a tall lever on your sewing machine that you can use to hold the thread in place while it’s being used. We’ve mentioned before how important high-quality thread for sewing machines is, so be sure not to forget about this when going shopping!
Step 6: Thread Your Machine
In order to make sure that your stitches come out correctly, you need to thread the upper part of your machine.
To do this properly, add a spool of thread into the Spool Pin then draw some from it and loop around down across up over down where the needle is located in case there are issues with how you threaded it.
Step 7: Guide The Thread Towards The Needle
To start, slip the thread through your sewing needle and pull it tight. Then look for a knob-like wheel on the side of your machine—turn this gently three times until you see that thread pop out from underneath towards the top. Your needle should always be sharp to get great stitches!
Step 8: Thread Your Bobbin
If you don’t have a bobbin, we recommend using one that has two holes in it. You will need to feed the thread through both of these holes and then wind them around the bobbins while following step 9 on our guide.
Step 9: Wind Your Bobbin
Before you can start sewing, your bobbin needs to be filled with thread.

Start by locating the spindle for winding bobbins on top of your machine and place it in one hand while holding onto the end of a threaded needle in another.
Using both hands press down slowly until all that’s left are just inches between them; then move over to step 10!
Step 10: Add Threaded Bobbin To Your Machine
After you have followed the instructions from your manual, it is time to add a threaded bobbin.
There’s light clicking noise once your machine senses that the bobbin has been placed inside its case and it will be on track if you hear this sound. You can then put back both cases or covers of the bobbins into place as well.
How To Set Up A Sewing Machine For Quilting – Step By Step Guide
Wrap Up
After taking the following measures now you can begin sewing. For beginners, I would recommend beginning with paper as it will help you understand the required pedal power and manage the desired speed.
Also, try cutting on paper before on clothes. It will help you in designing different dresses or quilters as well.
However, the following steps are more than enough to start your sewing journey. If you want to learn in detail about threading you can check out our article on how to thread a sewing machine or Why Does My Sewing Machine Thread Keep Breaking.
Check Out These Posts Too!

Robert Patricia
Robert Patricia is a data analytic and content creator. He has worked extensively with large data sets to glean insights for both public and private sector clients. He has used this knowledge to create compelling content for brands across the internet. Albert also enjoys creating content for websites and social media. He is an expert at creating catchy headlines and understands how to capture the attention of readers.
