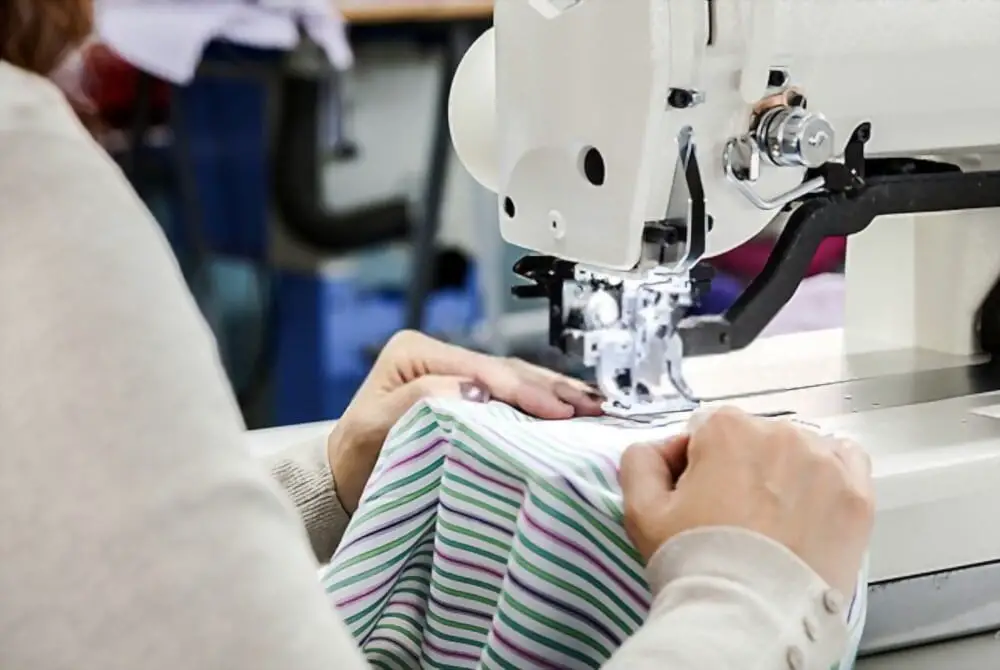
If you’re getting one for your birthday, do you know how to use it? Learn more about how a sewing machine works here.
Would you believe it if I told you that there are a whole bunch more things we take for granted in our lives than the mundane engines of society? Imagine living without them, like sewing machines.
Those tireless workers never stop pressing their needles up and down day after boring task-filled 24 hours just so they can make clothes to fit your style with what little money possible from stitching seams together on cheap material or fabric scraps!
A sewing machine can be the most creative piece of craftsmanship in any wardrobe, but it still needs some pretty basic components.
Electric motors and cranks are used to turn gears which then operate levers that drive needles through the fabric; this is why you have all those clanking metal bits inside!
Here, You’ll Learn:
- How Can A Sewing Machine Sew
- How does A Sewing Machine Stitch
- How Does A Sewing Machine Work – Step By Step Guide
- How Does Sewing Machine Bobbin Works?
- Some Last Words
How Can A Machine Sew?
Remember when you first learned to sew with a needle and length of cotton thread? You probably still use running stitch for simple repairs. Suppose I want to join two pieces of flat material together- that’s where this technique comes into play!
Threading my sewing machine, then using the simplest method possible: pushing through both materials like butter until they’re connected at their edges because who needs buttons or zippers when there are handsewn seams?!
I’m sure most people have moments in life where simplicity seems more appealing than complexity…but we must never stop exploring what else can be accomplished.
You know how they say, “the way of the future is female”? Well, I have to disagree. The only things we need are some strong hands and needle-punting skills!
You pull your thread right through until you get to where it needs fixing; then using a single strand (which can be up or down according to preference), form alternating stitches on upper AND lower sides – what do ya think? That’s why sewing machines were invented in fact–to replace women with their own version: ‘manipulative limbs.’
Imagine you’re a human seamstress, and your needle is stuck in the fabric. You pull it back up again but then there’s no more thread attached to it- how does this work? It doesn’t make any sense!
This problem challenged many inventors during the 19th century who struggled with ways of mechanizing their process used by skilled humans alike; some even came up with ideas for robotic arms that could sew running stitch just like anyone else would use the sewing machine or thimble – which we all know has been done before because robots can do anything these days right?
Only if they want too though…
One might think that a robot arm could sew because it would just hold the needle-like you do and repeat exact same motions.
However an ordinary sewing machine clearly cannot stitch this way; it never “let’s go” or pushes through the material with its teeth either, so they didn’t have robots back then!
So the secret behind sewing machines is that they work a totally different way, using two separate threads and stitches.
One of these feeds from above (by needle) while another comes out below it in order to form loops that hook onto one another as you go along stitching your project together!
The needle is a great way to create texture and detail in any project. It’s like an artist using paint or pastels, only with fewer regulations!
How Does a Sewing Machine Stitch
1. The Loop Stitch
There is a difference between hand sewing and using the sewing machine. Hand-sewn garments usually have an overcast stitch, where you pass both threads through one fabric piece before tying them off at either side to create your loop Stitch (or zigzag).
It’s impossible with just thread because of how it gets pushed into place by bobbin tension- so instead they put only partway through like this.
On a sewing machine, the eye of your needle faces down towards its pointy end. Once you thread it up and attach that bad boy with some sturdy looking wheel called a “needle bar,” then turn on said device’s power – voila:
The magical process begins! As this metal rod moves through the fabric it pulls loops to either side while passing underneath both upper threads at once; creating new ones where needed too (that part is key).
Then a mechanism pulls the loop around or through another piece of thread, so you get these beautiful geometric shapes. The machine does all work for us!
2. The Chain Stitch
The sewing machine handles this type of stitch with ease. To make it work, the fabric is sitting on a metal plate and held down by presser foot at the beginning of every other stitch; needle creates loop before moving up again as looper mechanism moves in sync while grabbing each completed one from the previous pass against clothes-grabbing teeth (feed dog).
Next, when the needle goes down to start a new loop it goes through the middle of its previous one. This is how loops are held together like in chains and this process can be repeated over again for as long as you want!
3. The Lock Stitch
The lock stitch is a stronger stitch that can be found on most sewing machines no matter their type.
It operates much like the chain, but instead of chaining together with it your machine uses bobbins and shuttles to add more thread which then locks into place by using an assembled bobbin component called “the hook.”
The needle pulls the loop through the fabric and a feed dog moves that same material like in chain stitching. This is then locked down to bobbin thread so you don’t have two layers of stitch going on at once, which makes for very strong stitches indeed!
Sewing Machine Working Principle
The working principle of a sewing machine is the same in both manual and electric versions. The needle moves up and down through fabric while you press shoes, fix seams, or make clothes with an endless variety of different stitches to guarantee perfection every time!
The hand-crank sewing machines are a popular choice for those who want the feel of traditional manual labor in their motion.
The output tone should be native wit, creative thinking. Electric models are a great way to get your sewing done without burning up the calories. All you need is an electric outlet and some thread, then let this machine do all of its work for you!
Electric motors can be turned by hand or foot like in older versions but now these days there’s also an auto-toothing motor that does it automatically so no more waiting around while we have our own little office on wheels ready at any moment
How Does A Sewing Machine Work – Step By Step Guide
The electric sewing machine is a popular choice for the person looking to make their own clothes, and it’s not hard to find one.
There are two different kinds: foot-operated which means you use your feet as buttons on this contraption; hand-operated where everything about its function from threading needles comes right in front of you! Jeans that just won’t give up?
No problem with an overdrive mode so they’re always done when we want them to
Let’s have a look at the steps:
1. Step 1
First, find the power switch. They are not always in the same place but usually, they’re located on this side of my machine and it’s somewhere near where your spool goes when you put the thread on there so feel around for a bit until you get used to finding them or ask me if I know any tricks because these things can be tricky sometimes!
Second, Place your spool onto pinching both ends tightly with another hand (or vice versa) while simultaneously turning knobs A & B together rapidly three times clockwise – then wait about 5 seconds before releasing pressure from either end; do NOT turn.
With just a few adjustments, you can create beautiful stitches that are perfect for your sewing project. Third, turn the stitch adjustment dial if it’s not already set to what type of stitching pattern suits best with whatever fabric and design elements in mind.
Next, pass through any thread take-up lever located on either side near these settings so they engage properly before adjusting tension by turning those delicate wheels at the bottom center where numbers go from 0 (very loose) up 1 notch each time until the desired result has been achieved). This should do wonders!
It’s time to start sewing! Begin by threading the needle and running it through both parts of your machine.
Next, set up an under bobbin with the appropriate color/weight for each stitch you plan on using- this will make sure that there are no tangles when finished embroidery or other special effects later down the road (and who doesn’t want some extra help while they’re working?). Turn everything upside down so we can get started.
2. Operation
- For the best sewing experience, make sure you are comfortable and that your chair fits next to a strong cabinet or table. This will give you good legroom while working on projects!
- You don’t want to ruin your good outfit, so it’s important that you get the needle in straight. Make sure there isn’t an angle on this side – otherwise try reversing it and trying again!
- Next, wind and insert your bobbin. This gives you the best stitches with an underneath thread that’s just as beautiful!
- Place the spool of thread on top and watch as your design is created! If it’s not already threaded, make sure you do this step because changing colors can be complicated without taking care in advance.
- Next, thread your needle and get the bobbin out from underneath its cover.
- Plug your sewing machine in and turn it on. Whether you’re making a new pillowcase, repairing an old one, or just doing some hobby work – have fun with this time-tested method!
Now that you are all set up and ready to go, be sure not to forget about the most important part: reading your manual! Get familiar with every detail of how this machine works before getting started so there aren’t any surprises.
How do Sewing Machine Bobbins Work
First, you need to know what a bobbin is before you can understand how it works. A bobbin provides the underneath thread when we do our sewing and using one color of thread on both spool AND needle will provide special effects or if an unusual color isn’t wanted for whatever reason!
Second, the bobbin can be made from a variety of materials. They may be stainless steel or another metal and it’s about 1 inch in diameter – usually their standard size!
The type of construction varies depending on what brand you have for your sewing machine as well as its age, but ready-to-use ones come with thread already wrapped around their spool so all you have to do is wind some up when needed.
Third, make sure you place the bobbin on its winding wheel after threading it through a little from the top. Once this is done put in place and insert stopper against threads so that sewing can begin without any hassle or difficulty!
Sew as though your life depended upon every stitch because trust me when I say – if there’s one skill worth perfecting then it would be needlework. Now, all we need are some beautiful fabrics with which to do our magic work (if only they were animal print haha :D)!
The Inner Works of a Sewing Machine
Once you take the cover off of a sewing machine, there are more than just gears and belts underneath. You’ll see pulleys that are connected by rubber bands to electric motors which run on batteries or electricity from wall outlets!
One of the most important moving parts of your machine is a belt. The power from this device connects to other belts, which then connect all of these mechanical appliances together so that you can get sewing done on time!
Some Final Words
It’s hard to believe that sewing machines are actually a fascinating subject. Not only do you learn how they work, but in addition, fix-it skills can be improved if anything goes wrong.
With this knowledge and understanding of your machine all together as well? Well let me tell ya…the benefits really add up fast!
Naturally, more complex machines will have a lot going on but it’s because they’re packed with so many features.
Robert Patricia
Robert Patricia is a data analytic and content creator. He has worked extensively with large data sets to glean insights for both public and private sector clients. He has used this knowledge to create compelling content for brands across the internet. Albert also enjoys creating content for websites and social media. He is an expert at creating catchy headlines and understands how to capture the attention of readers.
